Scale Appwrite Storage with DigitalOcean Spaces

Every new skill I got pushed me further and further but working on full-stack websites in Node.JS and Angular is my secret love 😍 I have been improving my skills with these technologies for years.
Appwrite is an open source backend-as-a-service that abstracts all the complexity involved in building a modern application by providing you with a set of REST APIs for your core backend needs. Appwrite handles user authentication and authorization, realtime databases, cloud functions, webhooks, and much more! If anything is missing, you can easily extend Appwrite using your favorite backend language.
One of the core functionalities of Appwrite is Appwrite Storage. It allows you to upload, view, download, and query your project files. Appwrite Storage not only takes care of encryption, compression and antivirus scans, it’s also built on top of Appwrite’s flexible yet simple permission system. Appwrite lets you store any files such as text documents, icons, images, videos and more.
🚀 What is new in Appwrite 0.13
The Appwrite 0.13 release offers a much more powerful Storage service! You can now group your files into Storage Buckets for better organization, as well as better control over allowed size and extension. On each bucket, you can also specify a different set of permissions, and toggle additional features such as encryption and compression.
Additionally, you can now upload files with no size limitation. In this release, chunked upload is supported and you can split your file into 5MB chunks to gradually upload a file as large as your bucket settings allow. Don’t worry, chunk upload logic is part of our SDKs and if it sees a file larger than 5MB, chunk upload will automatically kick in. One more secret! Our SDKs now accept an onProgress callback that will be triggered each time a new chunk is successfully processed. Implementing progress bars have never been easier 💪
Finally, Appwrite Storage is no longer limited by the size of your hard drive! With Appwrite 0.13, you can now connect the Storage service with cloud storage providers such as DigitalOcean Spaces or Amazon S3. With the introduction of these adapters, you no longer need to worry about running out of space, or hitting bandwidth limits due to Appwrite Storage. More providers are coming soon, so stay tuned 😎 In this guide, we’ll take a look at setting up Appwrite Storage using DigitalOcean Spaces as the storage adapter.
🌊 DigitalOcean Spaces setup
Before we jump into Appwrite, let’s prepare your DigitalOcean Space. After logging into DigitalOcean:
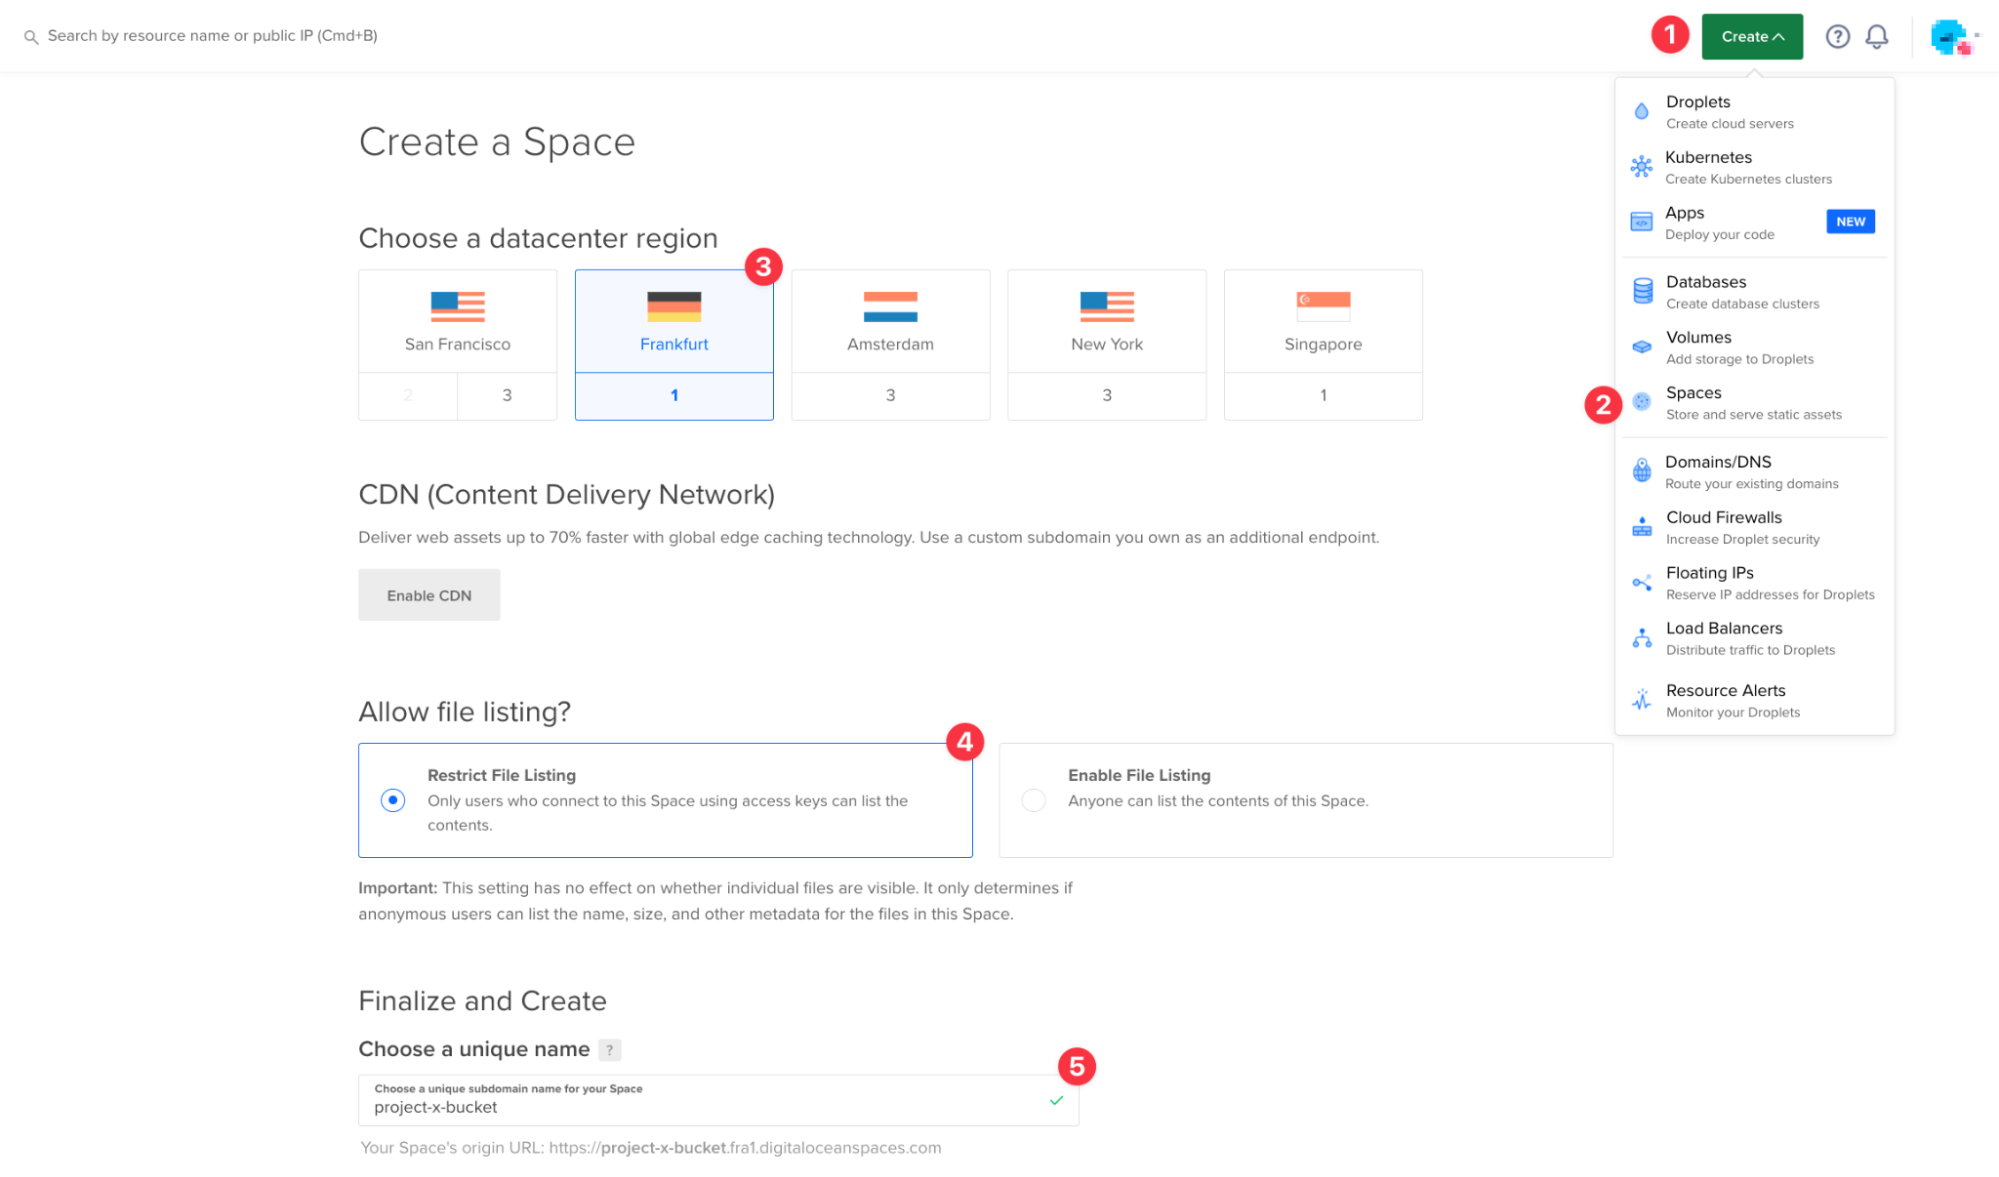
- Click the green
Createbutton in the upper right corner and selectSpacesfrom the dropdown. - You will be redirected to the
Create Spacepage, where we need to configure your file storage. Region and CDN configuration are up to you, but in theFile listingsection, you need to pickRestrict File Listing. This keeps our files secured from the internet, and only communication between servers will be allowed. - Before we finish the setup, provide your space with a unique name. Quick tip, this name will only be stored in the
.envfile of your Appwrite instance, and users will never see it. That means, the name can be as simple or as complex as you want.
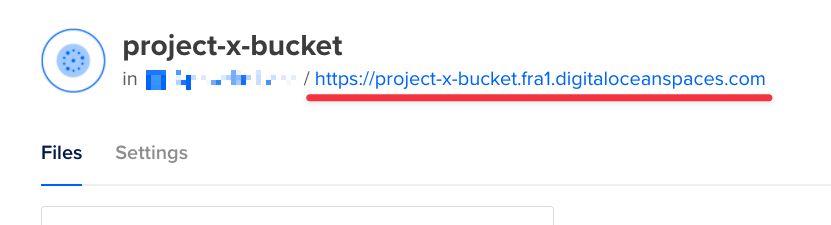
After creating the space, you will be presented with a space endpoint. Make sure to note this URL down, you will need it later when connecting Appwrite to DigitalOcean.
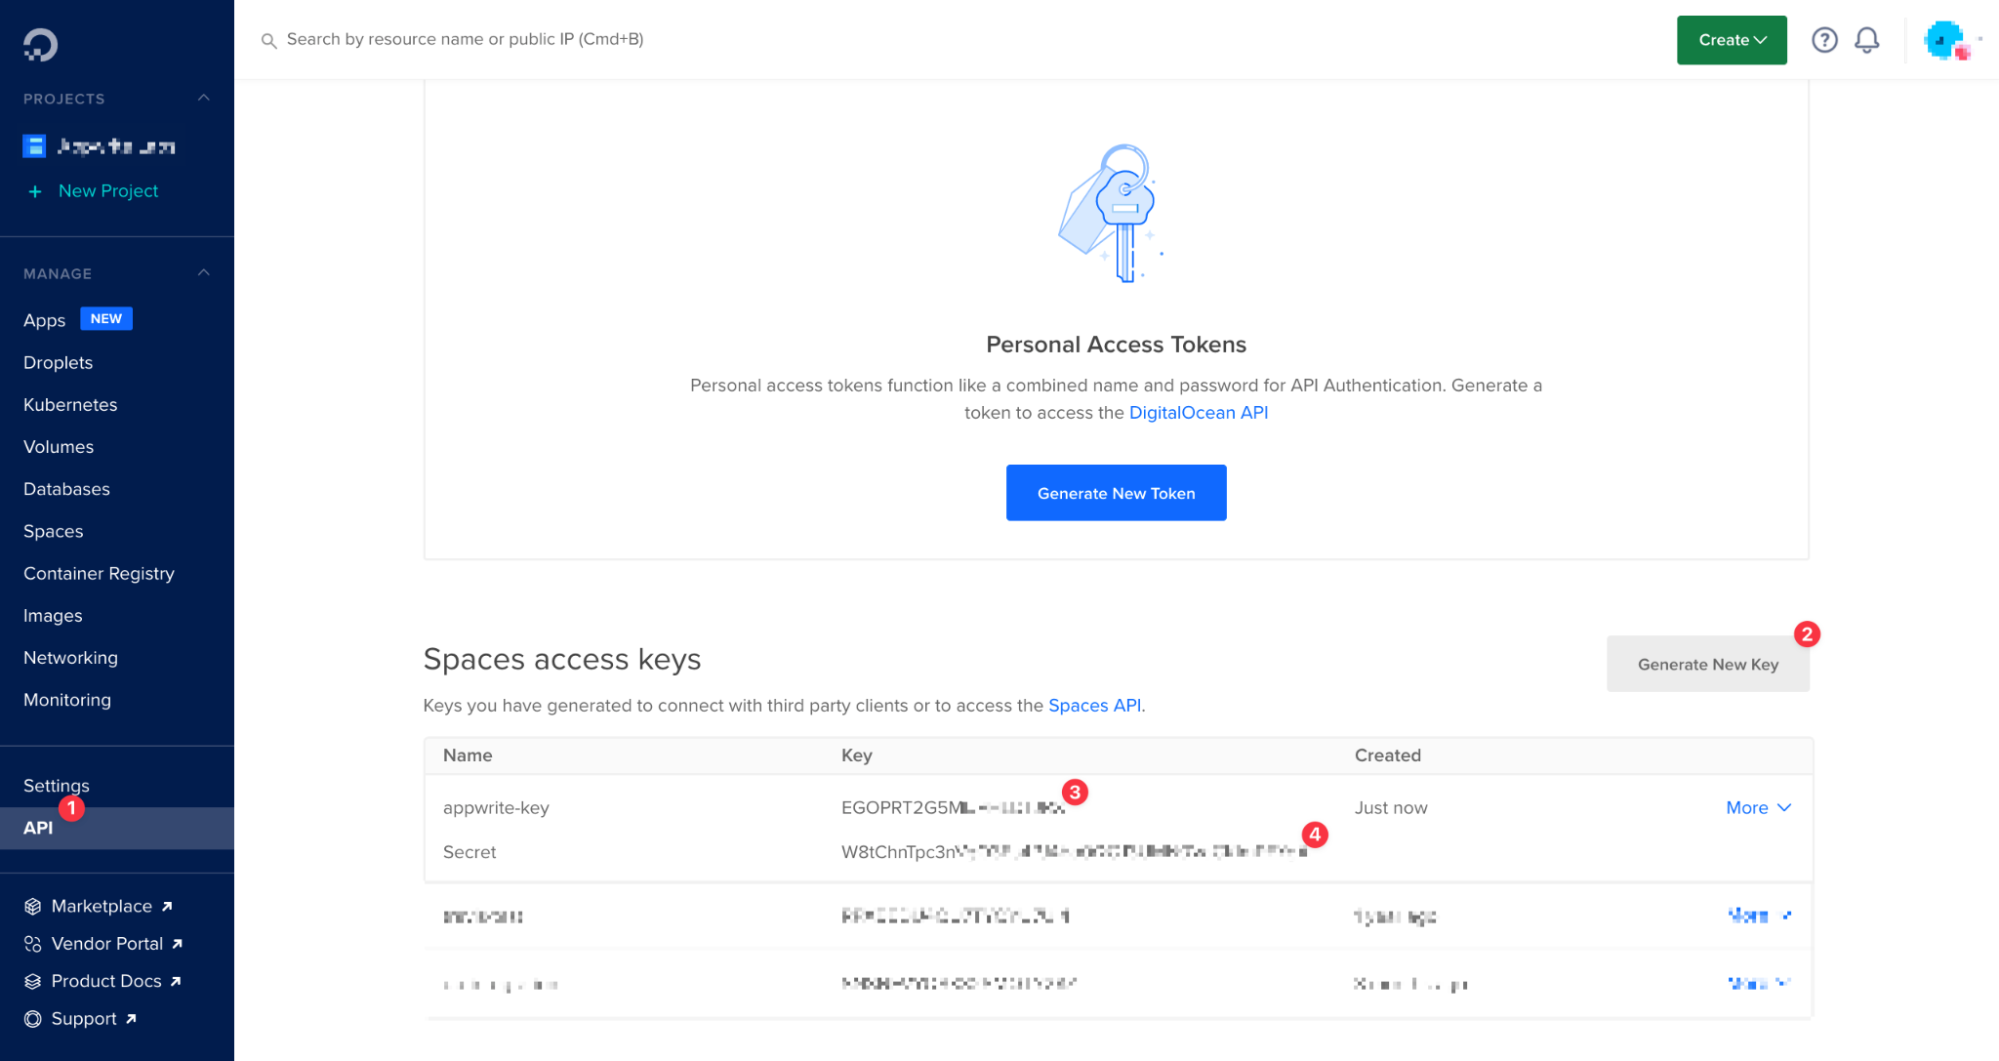
Last but not least, you need to get a set of access keys to allow Appwrite to read and write from your newly created space. To do that, visit the API page from the navigation on the left, and under the Spaces access keys section we click on Generate New Key. Give the key a name (no worries, this name is only visible to you), and click on the blue tick icon to finish the key creation process. You will be presented with two keys. The one that is on the same line as your key name is called Access key, and the one below is Secret key. Please note both of them down, but be aware, the secret key is a really sensitive piece of information and DigitalOcean won’t show it to you in future.
That’s it! You have successfully set up our DigitalOcean Space, and have all the required credentials in your hands. Let’s look at how easy it is to connect Appwrite to our newly created space.
🧰 Connecting Appwrite to DigitalOcean Spaces
Before you start, make sure that you have the Appwrite instance up and running. Installation of Appwrite is as simple as running one command:
docker run -it --rm \
    --volume /var/run/docker.sock:/var/run/docker.sock \
    --volume "$(pwd)"/appwrite:/usr/src/code/appwrite:rw \
    --entrypoint="install" \
    appwrite/appwrite:latest
To learn more about the installation process, you can check out our installation guide.
Once our Appwrite instance is up and running, we can configure the storage adapter. To do that, let’s enter the .env file and locate _APP_STORAGE_DEVICE. Currently, it’s set to Local, but since we want to use DigitalOcean Spaces, we change it to DOSpaces. With the new storage provider, we are now required to add new variables:
_APP_STORAGE_DEVICE=DOSpaces
_APP_STORAGE_DO_SPACES_BUCKET=YOUT_BUCKET
_APP_STORAGE_DO_SPACES_REGION=YOUR_REGION
_APP_STORAGE_DO_SPACES_SECRET=YOUR_ACCESS_SECRET
_APP_STORAGE_DO_SPACES_ACCESS_KEY=YOUR_ACCESS_KEY
Where do you get this information from? 😨 I have a neat trick for you! First of all, you can already fill in access and secret keys, these are the ones you got from earlier steps when creating API key on DigitalOcean. To get the bucket and region, you need to take a look at the space endpoint that we got after creating the DigitalOcean Space. For instance, my endpoint was:
https://project-x-bucket.fra1.digitaloceanspaces.com
There is a simple trick that is pretty easy to follow to get our bucket name and region. From my URL, the bucket name is project-x-bucket, and the region is fra1. Follow the same logic to extract information from your endpoint.
Once you have all of these environment variables configured, save the file and restart appwrite using docker-compose up -d. Did you notice that Docker is smart enough to only restart containers that use variables you just changed? 🤯
Once the Appwrite instance is restarted, create a new account and a new project. In the left menu, select ‘Storage’ and create a new bucket. Finally, upload a file into our bucket.
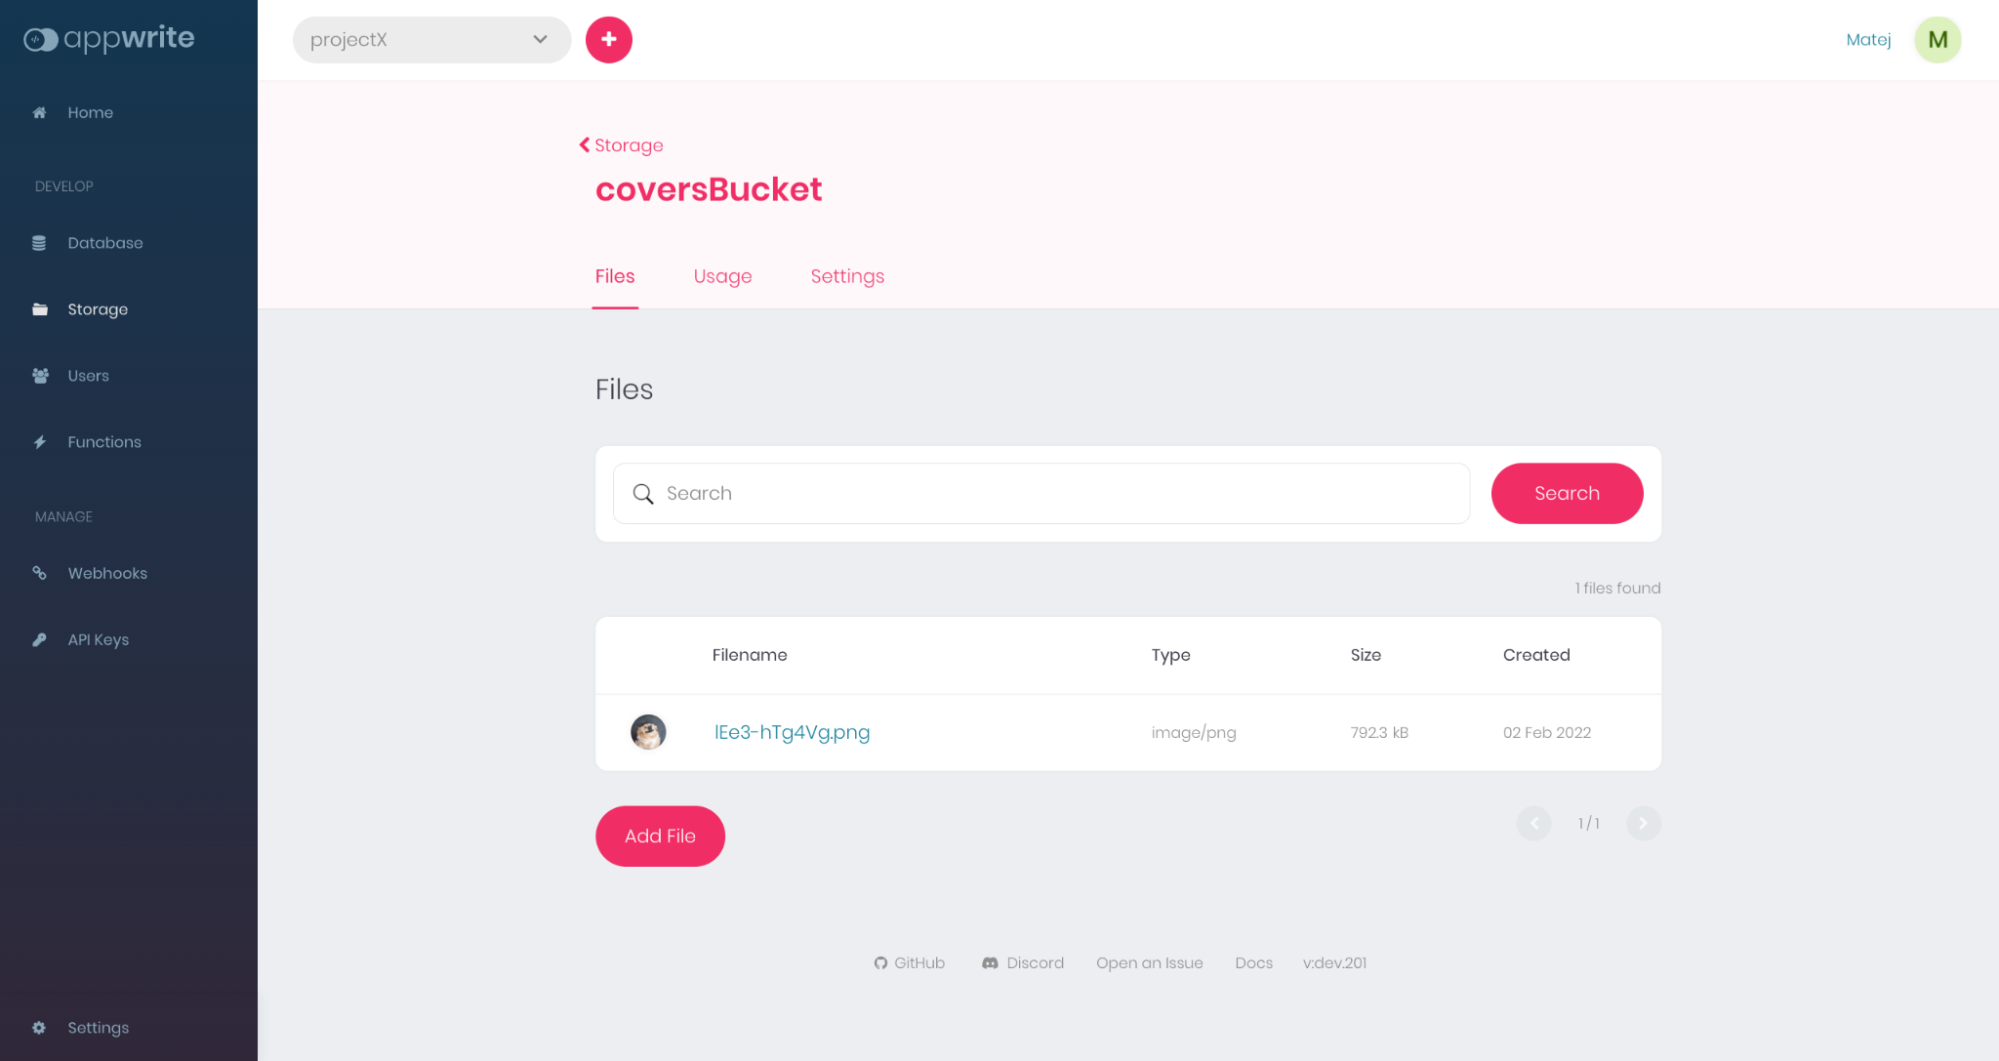
You can see the file was successfully uploaded, and can start using Appwrite just like usual! To confirm you are actually talking to DigitalOcean Spaces, visit your storage and you'll see the file in there.
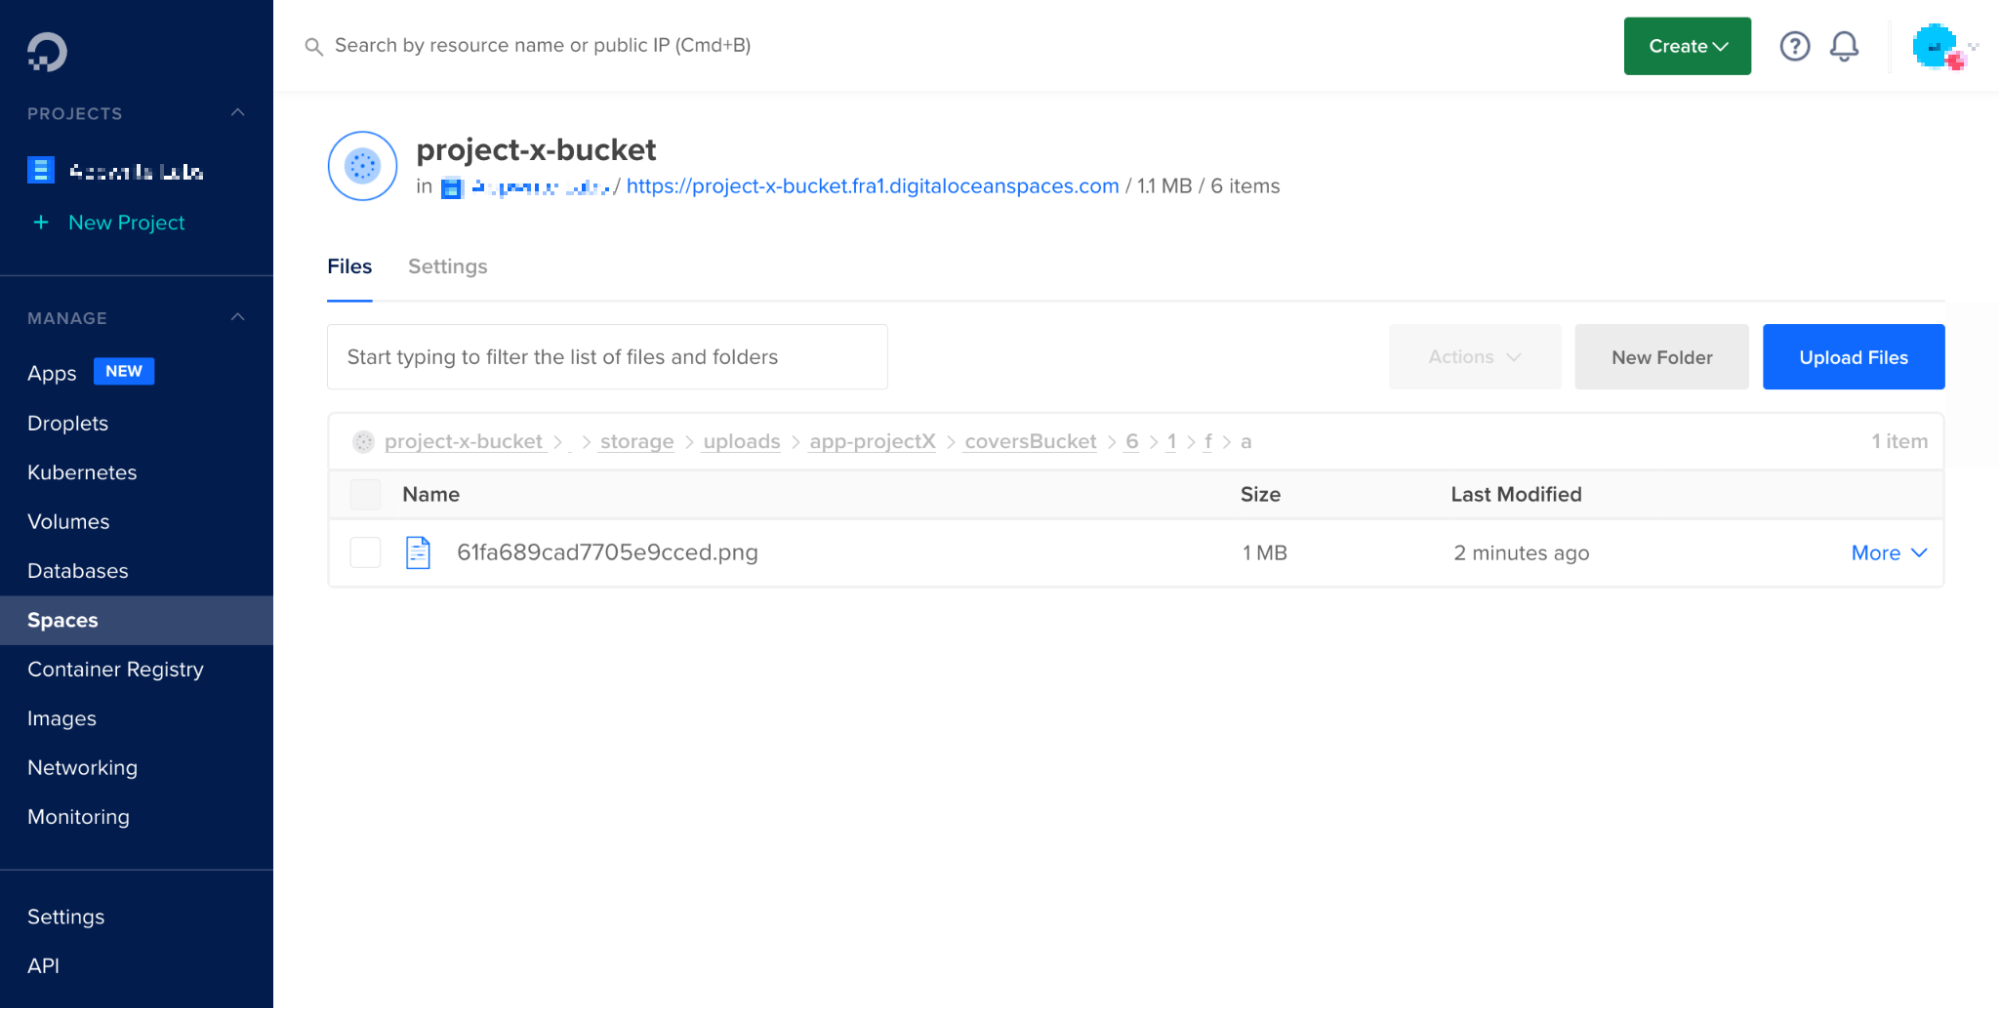
Congrats! You successfully connected Appwrite to DigitalOcean Spaces 🥳 If you plan to use files directly from your Space, there are a few things to keep in mind:
- Every file is compressed using GZIP compression before storing it in your Space. You will need to decompress the file after download if you plan to use it.
- By default, encryption is enabled on newly created buckets in Appwrite Storage. This means you won’t be able to view the file without decrypting it first. I recommend you disable encryption if you plan on downloading the files from your Space.
- All compression, encryption and antivirus are skipped for files above 20MB. These files are stored in your Space as plain files.
👨🎓 Conclusion
The worst nightmare for every project is bad scalability of their application. Thanks to the newly released provider system for Appwrite Storage service, you can now connect Appwrite with external storage providers instead of storing the files on your system. This prevents hitting a hard drive and bandwidth limits, as well as lets you use your favorite provider alongside Appwrite. And as you have seen in the tutorial above, you can easily connect Appwrite with DigitalOcean Spaces in just a few steps!
If you have a project to share, need help or simply want to become a part of the Appwrite community, I would love for you to join our official Appwrite Discord server. I can’t wait to see what you build!
📚 Learn more
You can use the following resources to learn more and get help:


